Tuesday, March 31, 2009


Spring is here, and it's all about rain showers, green grass, being outside, sunshine and butterflies! Here is a card I did for a CM butterfly inspiration challenge.

Nicholas & Scott


I did this layout to fulfill two separate challenges on CM that I had to do and post before month-end (today.) Genius me, I started at 10:30 last night. I'm becoming a bit of a procrastinator these days! Okay, maybe I should just out with it and admit - I'm lazy sometimes!! Anyway, I had to use patterned paper that I was holding onto and not wanting to use because I liked it so much, and follow a specific sketch too. I'm going to hurry up and post, as the rain is pounding down and I'm worried about losing power and the computer going down. Lucky you - it makes the story shorter lol!!! This is my two-page layout, two views, the second showing the hidden journalling.

Sunday, March 29, 2009

I love this site!

I am trying to keep my scrappy spending down to a minimum, and spend on the the amount I am required for my CTMH status, but I am finding it very hard, especially after going to this site:

http://www.newcleardollarstamps.com/

Why can't money just be unlimited? LOL!!! I love the Charlie Horse line... I may have to splurge just a tiny bit, maybe for my birthday. Think I should start hinting now :p

Friday, March 27, 2009


Here's a sketch from CafeMom that I didn't think I'd be able to do, but once things start moving, the thoughs come together. First is my one page layout, then the sketch below. This is an odd one for me, but I do like it. I think it will go in the frame in our kitchen for a while. Seems fitting I think! :p


I found this sketch on Cafe Mom, and I love it! I don't know if I'll have time to get it done today, but hopefully by Monday. I love it because it has space for multiple photos and still lots of room for journalling, which I'm known to do a little of :p

Thursday, March 26, 2009

I totally can't take credit for making up this book, but I can share how I made it. This is the direction that was posted on CafeMom:

Circle Flip Up book

by Stacey Carter

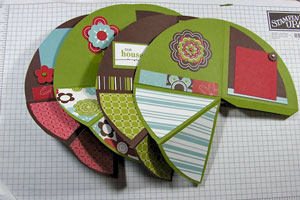
Create this quick album to highlight an event or person.

Supplies

  • Circle cutting system( or cutting mat, hobby blade, and salad plate)
  • 4 pieces of cardstock for base of project
  • Bone Folder
  • Sticky Strip™ or other strong adhesive
  • SNAIL Adhesive
  • Scissors
  • Patterned Paper
  • Ribbon

Step-by-Step

  1. Step 1

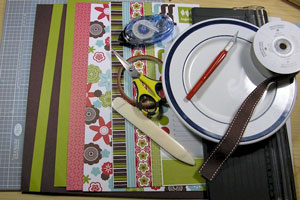
    Cut four circles out of cardstock. Your finished project will be 1/4 of the circle's original size.

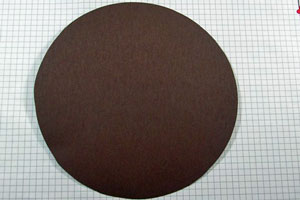
  2. To use a salad plate, place cutting mat on table. Put cardstock on cutting mat. Place plate on top of cardstock. Press down on your hobby blade all around the plate.

  3. Step 2

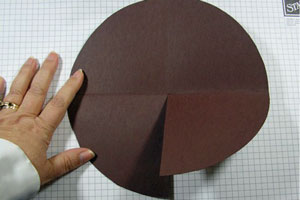
    Fold circle in half vertically using your bone folder.

  4. Step 3

    Fold circle in half horizontally using bone folder.

    image
  5. Step 4

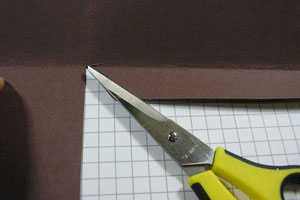
    Cut on fold line up to center point.

  6. Step 5

    Half inch down from fold line cut from right edge of circle to the middle fold line. This makes a flap on the lower right side.

  7. Step 6

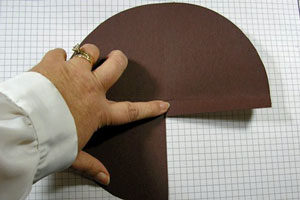
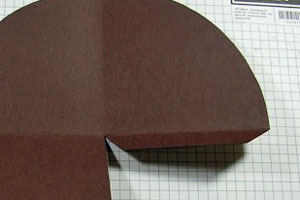
    Cut at least 45 degree angle cuts on both sides of the flap.

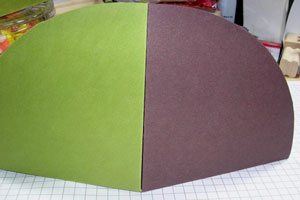
  8. You should now have 4 circles that look like this.

  9. Step 7

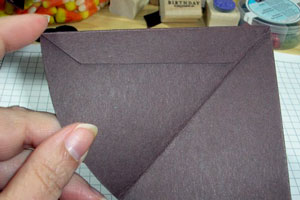
    Fold up the bottom left section.

  10. Step 8

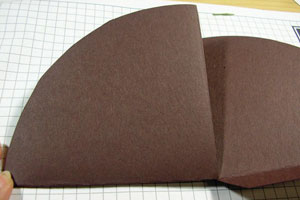
    With your bone folder fold the flap down in half. This will make a mountain fold.

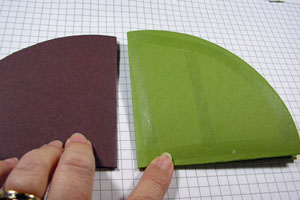
  11. This is what your circles now look like.

  12. Step 9

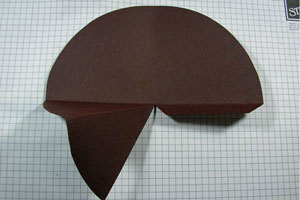
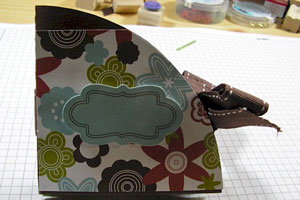
    Decorate your circles.
    It is important that you decorate this project before assembly and not place any decorations on your fold line.

    Use any paper or accessories you desire. Here, the pieces from the circle that I cut off were used as a template for the scrapbook paper. I cut it in half when I put it on the mountain folded section.

  13. Step 10

    Place Sticky Strip™ on flap close to the inner edge. This must be a permanent adhesive or they will fall apart.

  14. Step 11

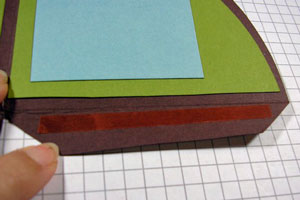
    Slide the lower left hand section over the flap. The flap will be on the bottom.

  15. Step 12

    You now have 4 panels. You will attach the 1st panel to the 2nd one, the 2nd one to the 3rd one and the 3rd one to the 4th one. The 1st one is the front of your book. The 4th one is the back of the book.

    Place snail (or other adhesive) all around the edge of the panel and 2 stripes in the center. Line them up on the bottom corner and edge. Then smooth them together.

  16. Step 13

    Cut 24 inches of ribbon. Center the ribbon around the book. Tape the ribbon to the front and the back panels (not the spine).

  17. Step 14

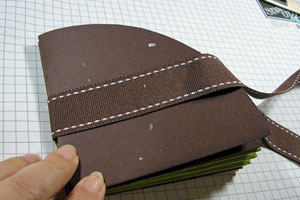
    Decorate the front and back of the book as desired.

  18. Here is the book open. You can tie it open so it sits nicely on a table.


I wasn't planning on doing daily postings, as that's just too much pressure to keep up, so I'll say that my stuff will be... sporadically regular. As much as I can make it so, anyway. This morning I am still loving these new monkey stamps that I bought from Archivers. Not so sure why monkeys are my thing right now... maybe because I'm surrounded by my own two little monkeys that are always climbing all over me and the furniture. They're cute, and I really like them.

I made this card with one of those stamps this morning. I started out wanting to use brown and green. I have this beautiful pigment ink stamp in brown - coffee bean brown actually. I've had it for a couple years, and never noticed the color name. For those of you that know me well, you'll know this is perfect for me. Anyway, I made this card with my youngest in mind, and my husband. Honey, looks like you'll be getting a couple of Father's Day cards this year lol!!!

Wednesday, March 25, 2009

This is like my new toy!


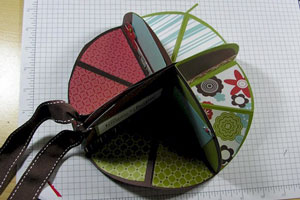
Okay, I had to do it. I had to come back on tonight to do a post. How could I not, now that I am officially an online existence? So, here is a project I made yesterday, called a circle pop up album. I can't take the credit for the design, as I got it from a CafeMom group that I am in. I used all Close to my Heart products to make it, and I love how quickly it came out, especially for an instruction-challenged person like me!

The Beginning

So I figured it was about time that I truly joined the online community! Many of my friends have their own blogs going, and I love seeing what they have done lately, and to keep up with them. I have a lot of projects that I am very proud of, and will be posting here over the next week or two. Thanks for taking a look! Let me know if you like my projects or if you have a blog of your own that you think I'd like! Happy Wednesday!

Give It Away - Paul Brandt